


5 Step Guide to Growing Gorgeous Garlic
Everything you need to know about why and how to grow garlic

Have you ever wondered where your garlic comes from? One of the most important reasons for you to learn to grow garlic is to avoid toxic chemicals and irradiation (that inhibit sprouting and extend shelf life).
Garlic … how safe is yours to eat?
A few years back, I didn’t even think about the garlic I ate. But then I became interested in the story behind the food I was eating. I started to look deeper at the source of my food. Where it came from, who grew it and how. I didn’t like what I discovered! It left a bad taste in my mouth.
Garlic – Did you know?
The majority of the world’s garlic is grown in China, the world’s largest exporter. It is sprayed with chemicals and may be bleached white with chlorine during importation quarantine processes. Not to mention the thousands of food miles clocked up travelling long distances in storage.
But if you really want to gag on your garlic, read on!
According to the CEO of the Australian Garlic Industry Association, “some garlic growers over there (China) use raw human sewage to fertilise their crops, and I don’t believe the Australian quarantine regulations are strict enough in terms of bacteria testing on imported produce.”
In the US in 2024, Senator Rick Scott of Florida introduced a bill to ban garlic imported from China which is yet to be passed into law. However, it’s a step in the right direction.
According to Australian Garlic Producers, “In China, chemicals banned in Australia are still being used to grow garlic. Australia imports 95% of our garlic from China. Chinese garlic is gamma irradiated to prevent sprouting and is also sprayed with Maleic Hydrazide to extend shelf life. All imported garlic is fumigated with Methyl Bromide by AQIS on arrival in Australia.”
To meet biosecurity requirements for imported garlic into Australia, garlic bulbs are often irradiated. [Learn more about concerns with irradiated foods]. Garlic is treated with a very toxic chemical methyl bromide, a fumigant used to control pests in food products. While methyl bromide itself is a gas that dissipates after fumigation, it can leave behind bromide residues.
High levels of bromide in food may pose health risks, including neurological effects. One study found fumigated garlic had residues of 2 to 11 ppm (parts/million) and cipollini bulbs up to 48 ppm bromide. Even though it has been banned for domestic use in Australia since 2005, there are exemptions for use in Quarantine, fumigation and specific horticultural uses. Go work that one out!
In Australia, most of the garlic we eat is imported. Yet we have many different local garlic varieties available to grow that don’t need to be biofumigated with methyl bromide.
You might consider choosing organic or locally sourced chemical free garlic instead of reaching for that perfect white bulb in your supermarket!
Garlic is SO good for us … but not when it’s treated with toxic chemicals.
Health Benefits of Garlic
The study ‘Potential Health Benefits of Garlic (Allium Sativum): A Narrative Review’ acknowledges “With its sulfur-containing compounds, high trace mineral content, and enzymes, garlic has shown anti-viral, anti-bacterial, anti-fungal and antioxidant abilities. Diseases that may be helped or prevented by garlic’s medicinal actions include Alzheimer’s Disease, cancer, cardiovascular disease (including atherosclerosis, strokes, hypertension, thrombosis and hyperlipidemias) children’s conditions, dermatologic applications, stress, and infections. Some research points to possible benefits in diabetes, drug toxicity, and osteoporosis.” Not bad for a humble herb.

Observational studies reported “the association of raw garlic consumption with improvements of important health outcomes, including cancer risk, cardiovascular disease, insulin homeostasis, and liver function.”
Another evidential review concludes “Garlic and its secondary metabolites have shown excellent health-promoting and disease-preventing effects on many human common diseases, such as cancer, cardiovascular and metabolic disorders, blood pressure, and diabetes, through its antioxidant, anti-inflammatory, and lipid-lowering properties.”
Still need more incentives to grow garlic?
4 Reasons You Should Grow Garlic
For health, amazing flavour and pest management in your garden.
Safe food = avoid imported garlic. It’s cheap for a reason.
Save money – organic garlic is currently averaging A$39-80/kg! Ouch.
It’s SO easy to grow, so there’s no excuse!
Garlic (Allium sativum) is a bulbous perennial herb but grown as an annual. OK – it IS slow growing. Most varieties average 6-8 months to harvest. But it’s NOT a ‘bed hog’ like pumpkins and doesn’t take up much ‘personal space.’ So I’m happy to dedicate at least 1m2 to grow garlic to feed my family for an entire year. It’s a member of the Allium (onion) family – all space savers!
Garlic is a staple ingredient in my kitchen all year round – for health and flavour!
Tutorial: 5 Step Guide – How to Grow Garlic
When to Plant Garlic
You can grow garlic in all zones. For higher yields and larger cloves, the best time to plant is generally Autumn in the southern hemisphere or Spring in the northern hemisphere. In Australia, we usually plant March/April. Check Gardenate.com to see when the ideal time is for you. Don’t despair though! Garlic can be planted during the year, but the size of bulbs may be smaller. When it tastes this awesome, you need less and it saves you so much money, so who cares?
“To grow gorgeous garlic, all you need is a little preparation and patience – the results are totally worth it.”
In 2011, I didn’t get the chance to plant in Autumn. So I sowed a stack of soft neck garlic I had left in my fridge on 25 August (late winter). I harvested it exactly 3 months later on 25 November. This was a wonderful discovery! Even though I had technically planted at the ‘wrong time’ of year, I found a garlic variety that grows well in my climate. In a speedy 3 month period, rather than waiting an average 6 months! So experiment in your climate zone.
If you live in a high rainfall area, avoid harvesting garlic in the wet season, because bulbs can rot. Time your garlic planting for a warm, dry harvest period. [See What to Plant When for your climate zone and use one of the calendar tools listed to help guide you.]
Benefits of Sowing and Harvesting Garlic by the Moon Cycle
I personally use this Moon Calendar to sow garlic on optimum root crop days of the month. My experiences have proved beyond any doubt that sowing, fertilising and harvesting garlic and other crops according to Nature’s moon cycles certainly makes a massive difference. I’ve experimented many times over the last 14+ years to see if timing really has any effect on sprouting, growth and bulb size. My results have confirmed to me that this is the ONLY time to sow and harvest garlic for bigger bulbs and a long storage life. Here’s an example:
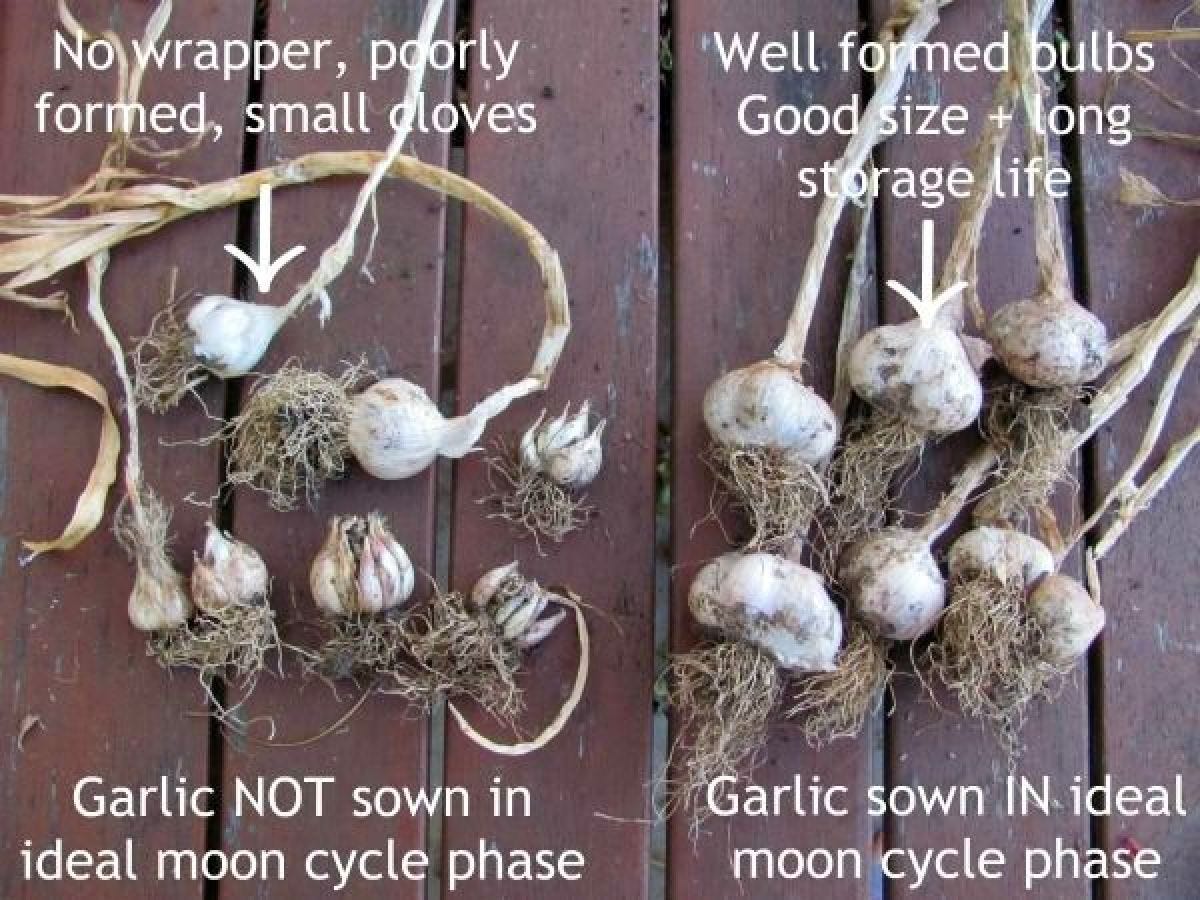
The photo above shows the difference in harvest results by sowing my garlic at different times of the moon cycle. After preparing my soil, I sowed 100 bulbs of garlic during the phase of the moon most suitable for planting root vegetables. Just two days later, ALL cloves were sprouting! That’s right – 100% germination.
In the same soil right next to these cloves, I sowed another 20 cloves. Just two days later but NOT in the same moon phase. This was a dormant phase of the month when plants do the least amount of growing. This is a time of rest and low energy.
The difference was astounding. It took over a month for those 20 cloves to sprout, even though I sowed them only 2 days later! Even more interesting was they were straggly plants that never caught up in size or harvest yield. As you can see in the first photo, the bulbs had very small cloves and the outer protective paper wrapping didn’t form properly. Their storage life was minimal so these cloves had to be eaten quickly.
Curious to find out the difference just two days difference in timing made? Watch my video to see the results of my experiments.
The 100 larger bulbs were harvested just 3 months from the date of planting. Whereas, the 20 poor quality garlic plants took nearly 5 months before they could be harvested. When I did, they were a massive disappointment. There’s nothing worse than waiting months for your garlic, giving up valuable garden space and having a disaster!
If you have a short growing season for garlic, timing can make a HUGE difference to your yields. I always harvest garlic in the correct moon cycle to increase bulb storage life.
The only difference was timing and planting by the moon. That’s why I get excited about working with nature’s moon cycle and sharing my experiences with you! The results speak for themselves. I hope you’ll try this simple technique to get a better garlic crop.
Now for your step-by-step tutorial.
Step 1: How to Select and Prepare Garlic
Garlic doesn’t grow from seed but from mature bulbs separated into cloves.
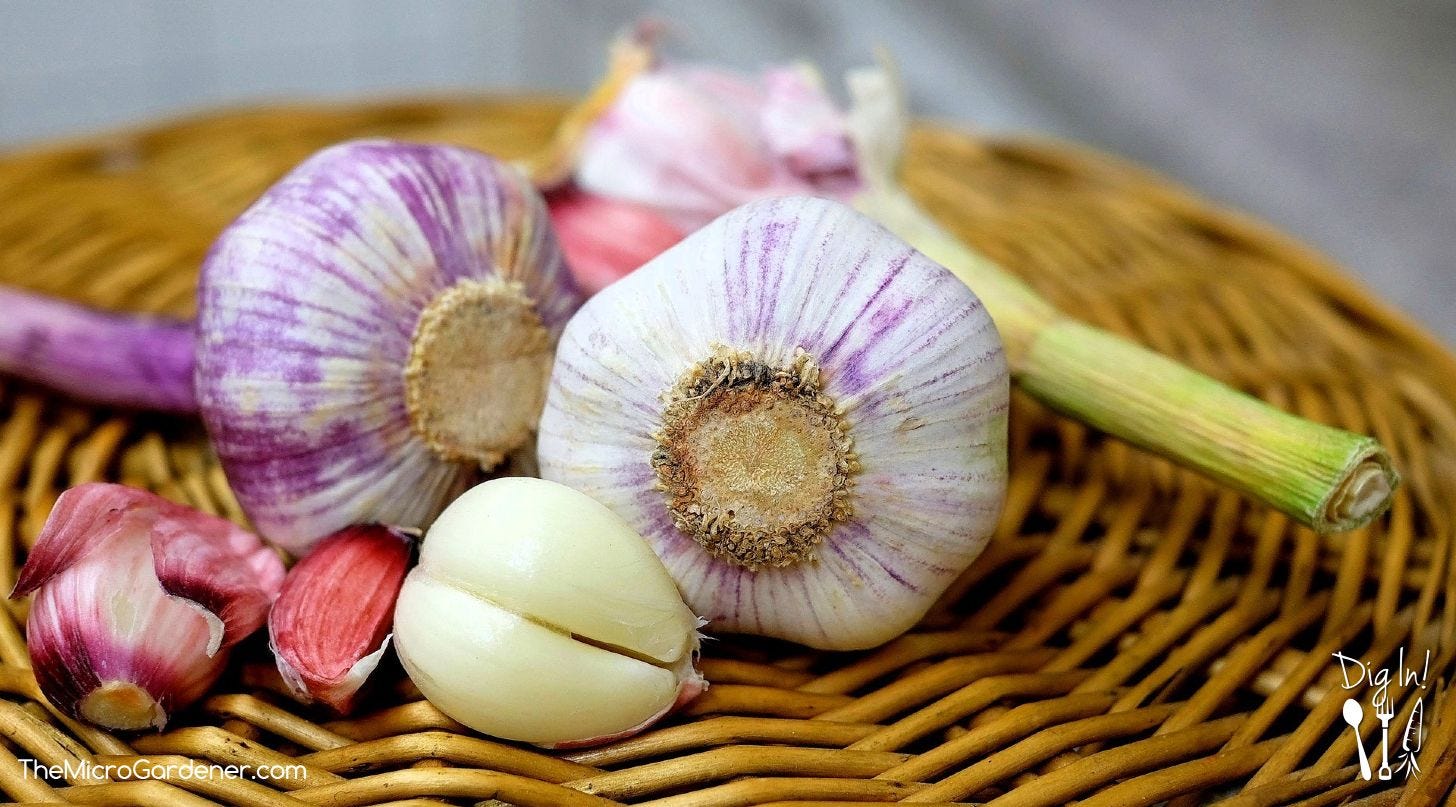
Choosing Garlic Varieties
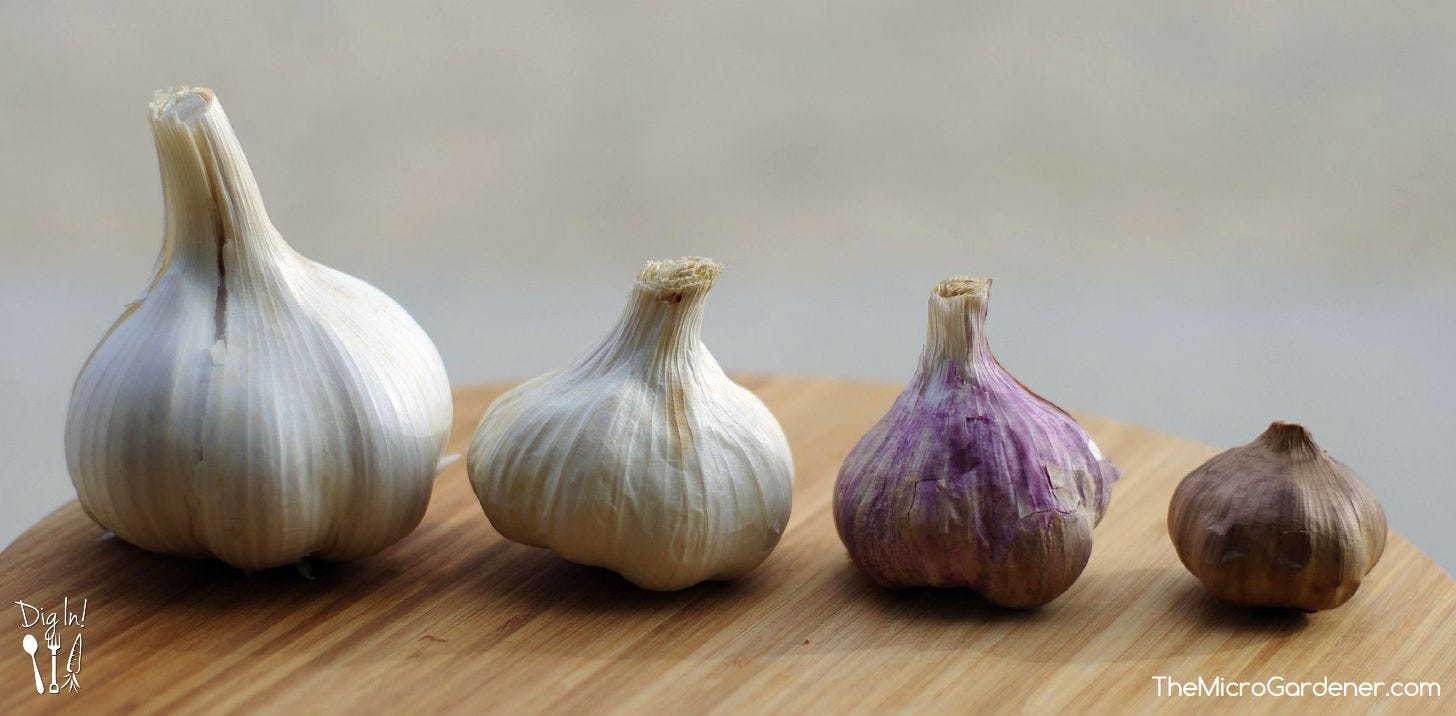
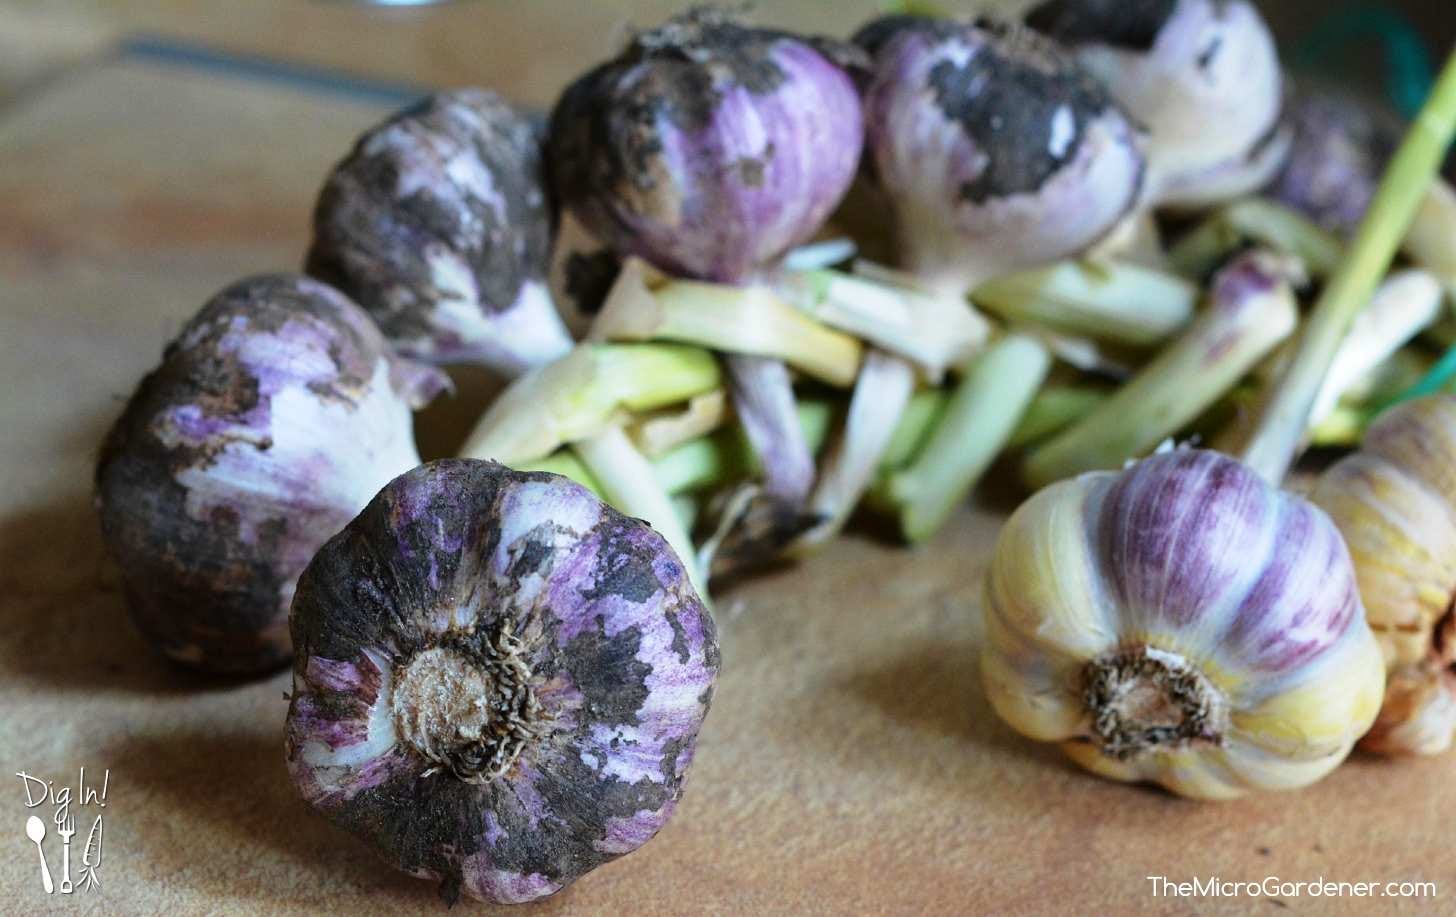
Soft neck varieties braid and store well. They usually produce 12-13 cloves/head but have no flower stem and suit warm climates with mild winters. One of the best varieties for our subtropical Queensland zone is ‘Glen Large’. I’ve also grown ‘Early Italian Purple’ and ‘Italian Pink’ successfully as well as a few others.
Hard neck garlic types send up a hard, flowering stem. So these varieties are less suitable for braiding. They are milder tasting, but have a shorter shelf life. This is because they have less layers of skin around the bulb.
Elephant or Russian garlic is not a true garlic. This kind of garlic is also known as a bulbing leek and has a milder flavour. Select varieties that grow well in your local climate zone.
Where and When to Buy Garlic
Source locally grown organic ‘seed garlic’ from organic growers and shops, online and farmers markets if you can. If that’s not possible, then look for heirloom and chemical-free varieties suited to your climate online. We generally plant our garlic in March in subtropical Queensland. Start sourcing your planting garlic in January or early February or you’ll miss out.
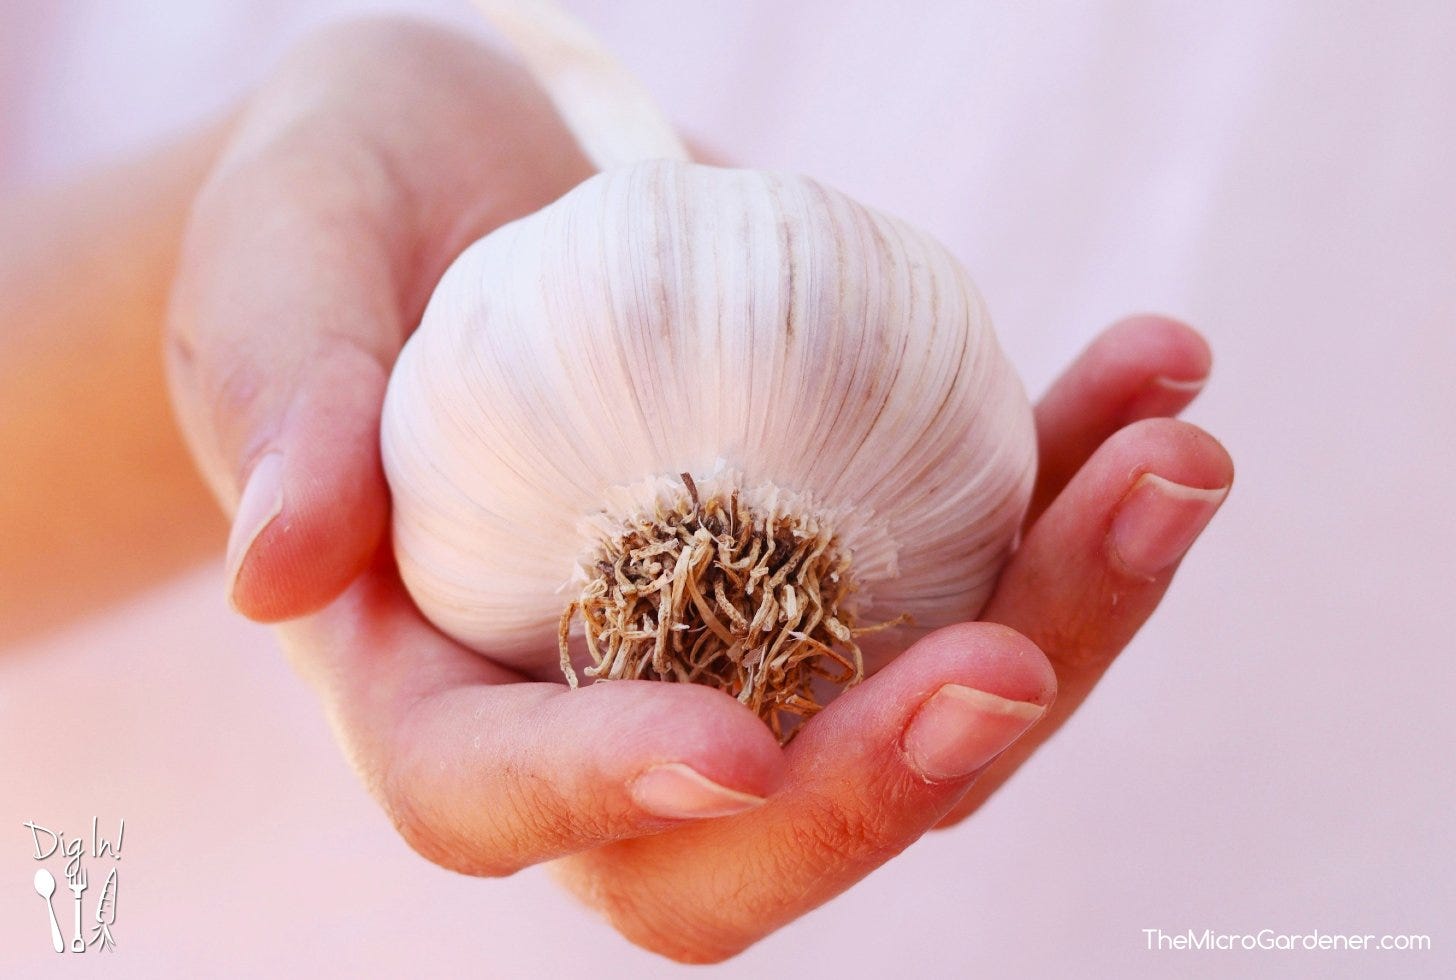
How to Select Garlic Bulbs
If buying garlic from a store, choose your bulbs carefully. Pick the largest garlic bulbs you can find. The size of the cloves you plant will determine whether you get big or small heads when you harvest.

If you’re planting garlic from bulbs you harvested last season, save your larger ones for this year’s crop. Make sure there are no signs of disease, marks or soft spots. Quality matters! Count roughly how many cloves/bulb to determine how many bulbs you need to buy for planting.
How many? How much do you eat?! We eat a lot of garlic. So I plant enough to have at least one bulb every week of the year (52 + a few extras as a buffer). Expect to lose some to adverse weather conditions. Each clove grows 1 bulb. On average I plant 100-120/year. That gives me some to eat, save for next season and sell.
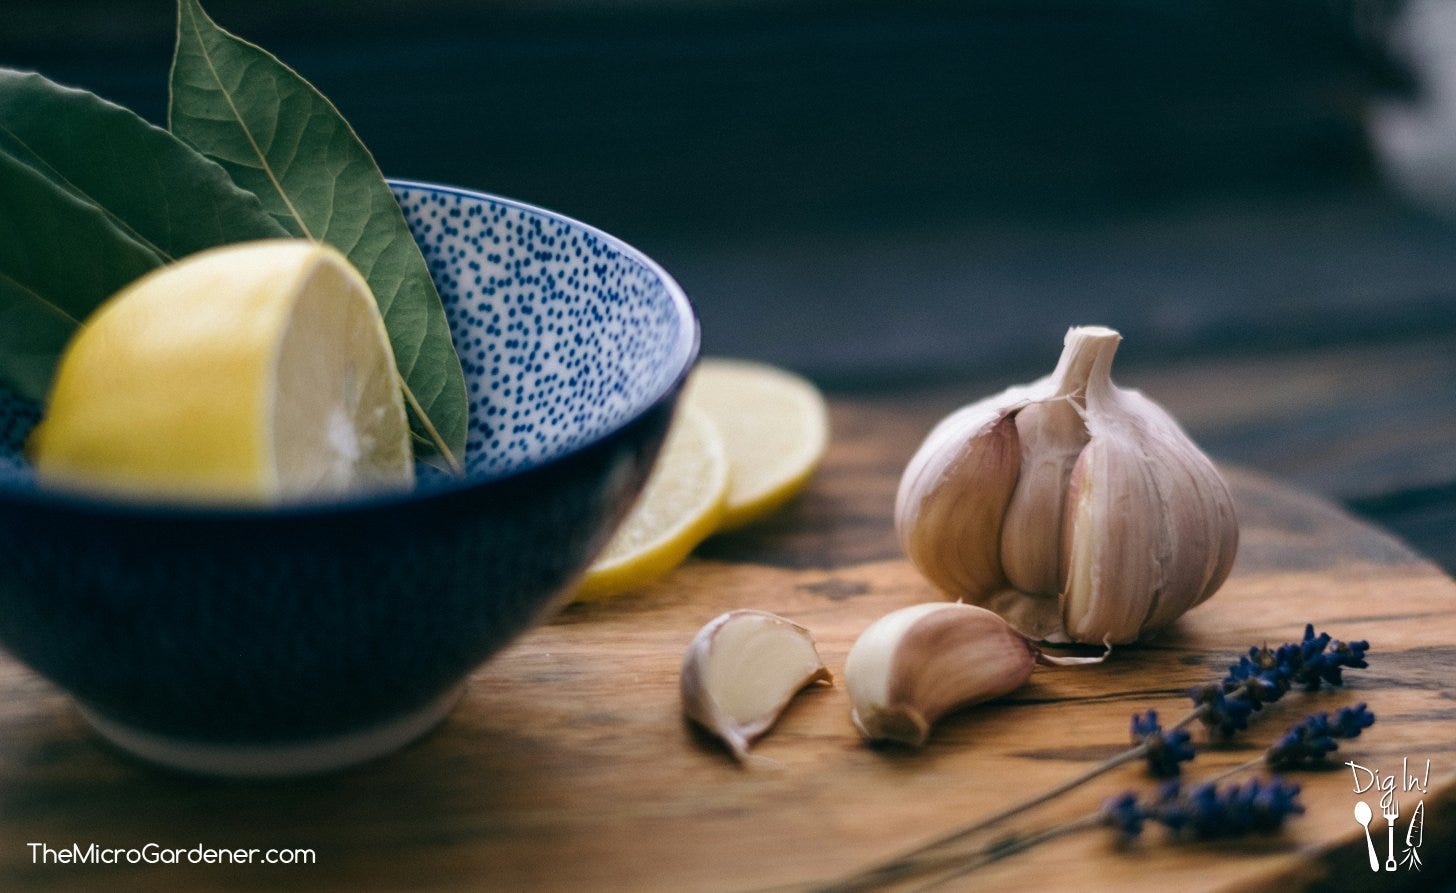
How to Prepare your Garlic Bulbs for Sowing
Plan ahead for when you want to grow garlic. Chill garlic cloves in the fridge for a few weeks before planting. This improves bulb development. You can skip this step but it helps grow bigger garlic.
Shortcut: Pre-sprout your garlic bulbs so they have roots before planting. Watch my video for how to accelerate root and shoot growth.
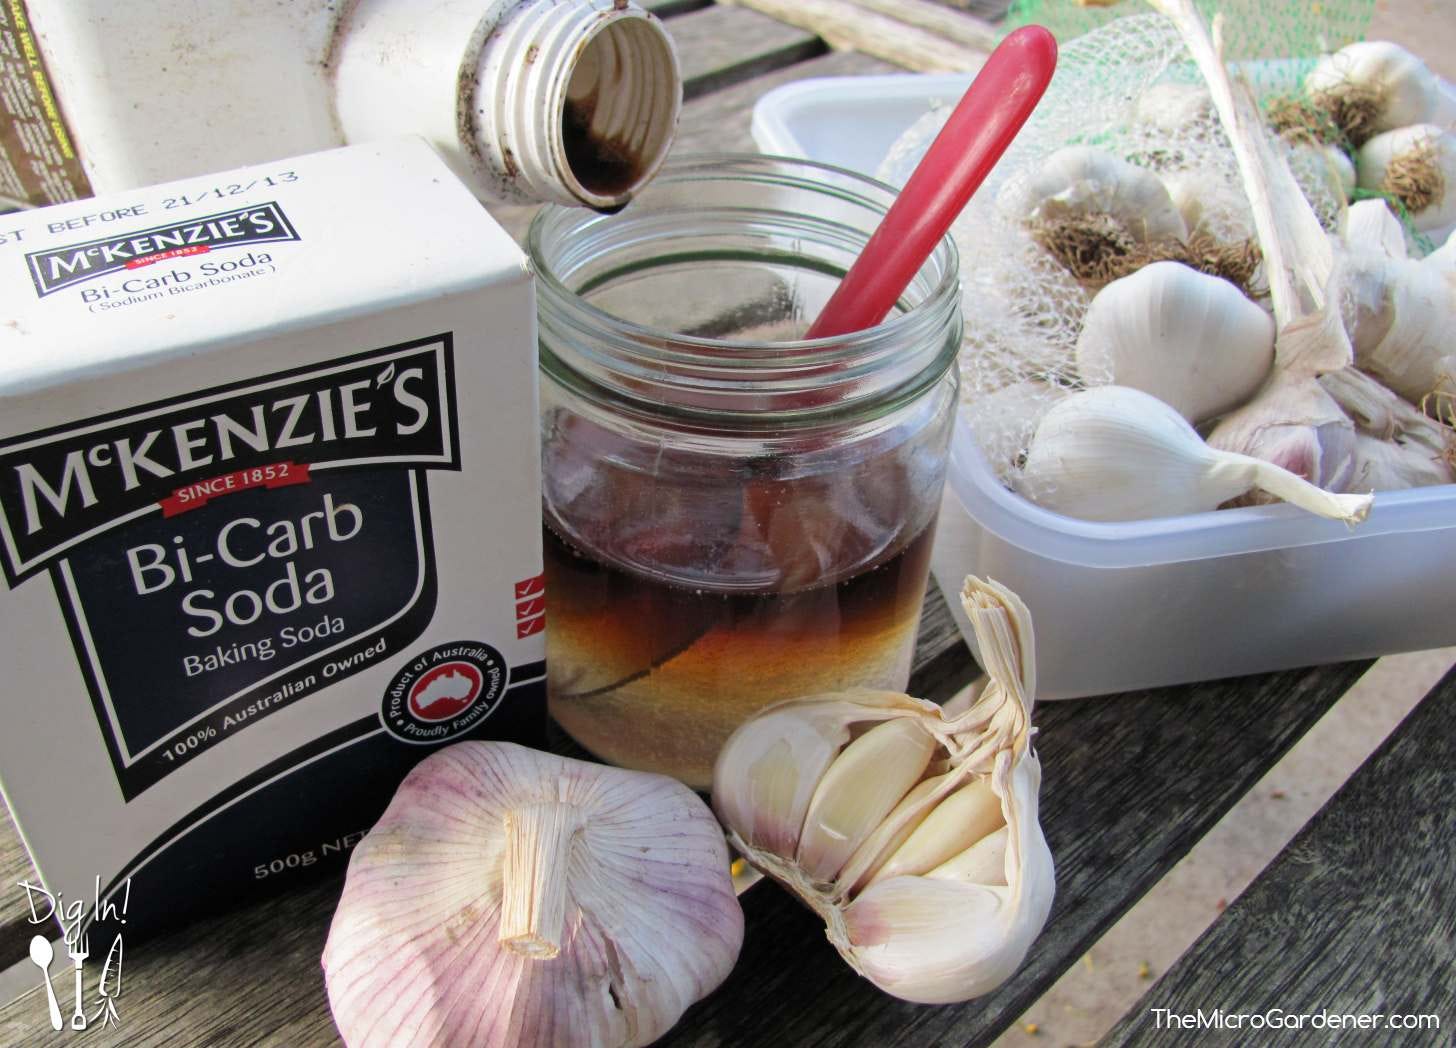
To prevent rotting in the soil if sowing direct, here’s a little tip. Soak your cloves in a glass jar with equal quantities of baking soda to organic liquid seaweed for 2 hours. e.g. for 8-10 cloves (1 average bulb) = 1 tblspn baking soda: 1 tblspn seaweed. Increase the quantity depending on the number of cloves you’re planting.
Step 2: How to Prepare your Pot or Garden Bed
Soil test with a pH tester or kit. Garlic prefers soil with a pH 6.5 – 7.0. If you need to raise your soil pH, consider adding dolomite or agricultural lime.
LIKES: Full sun position; well-drained, humus-rich soil. Add worm castings, homemade compost, humus, or blood & bone. I add rock minerals and trace elements for optimum nutrition. Garlic is a hungry root crop so adding organic matter and nutrients is vital. The soil needs to be light and fluffy. Avoid rocks, compacted soil or heavy clay. You can sow directly into your prepared nutrient-rich soil. Alternatively make your own nutrient-rich potting mix like I do and grow in containers.
Garlic LOVES mulch to prevent weeds, provide protection, maintain soil moisture and keep soil cool longer.
DISLIKES: Too dry (when young), too wet or freezing. The colder your winter, the deeper your mulch should be. I add about 8cm (3.5-4″) here in the subtropics, but very cold areas could need 10-15cm (4-6″).
Companion Planting: Garlic helps improve the health and growth of other plants including raspberries, beetroot, strawberries, tomatoes, lettuce, summer savoury and roses. On the flip side, never plant garlic near legumes like peas or beans. I’ve seen this in practice (even with chives and spring onions near bean plants). They just won’t be friends as they compete, so don’t waste your time and money!
Garlic is a member of the Allium family (onions, leeks, chives, shallots) so companion planting rules apply to all those family members.
Location: Good crop rotation practices help prevent diseases. So avoid planting garlic where you’ve grown members of the Allium family in the last couple of years. If you have to reuse a pot, add fresh potting mix.
Step 3: How to Plant Garlic
Timing: Ideally sow garlic during autumn. [See the Benefits of Moon Gardening to learn more about sowing crops at the optimum time each month and using a Moon Calendar].
Separate the garlic head into individual cloves just before planting. Largest cloves will be around the outside and are ideal for planting. Small inner cloves and green shoots can be used for cooking.
Be gentle to avoid bruising the garlic. Cuts and bruises can provide entry points for rot to set in.
Sowing: Make a hole with your finger or the handle of your trowel roughly twice the depth of the clove (about 5cm/2in) and 10cm/4in apart.
Plant each clove with the pointed end facing upwards.
Press down very firmly as you back fill with soil. This prevents the cloves being pushed out after a few days as the roots start to develop. Check at this stage and reposition them back into line! Water in well with liquid seaweed.
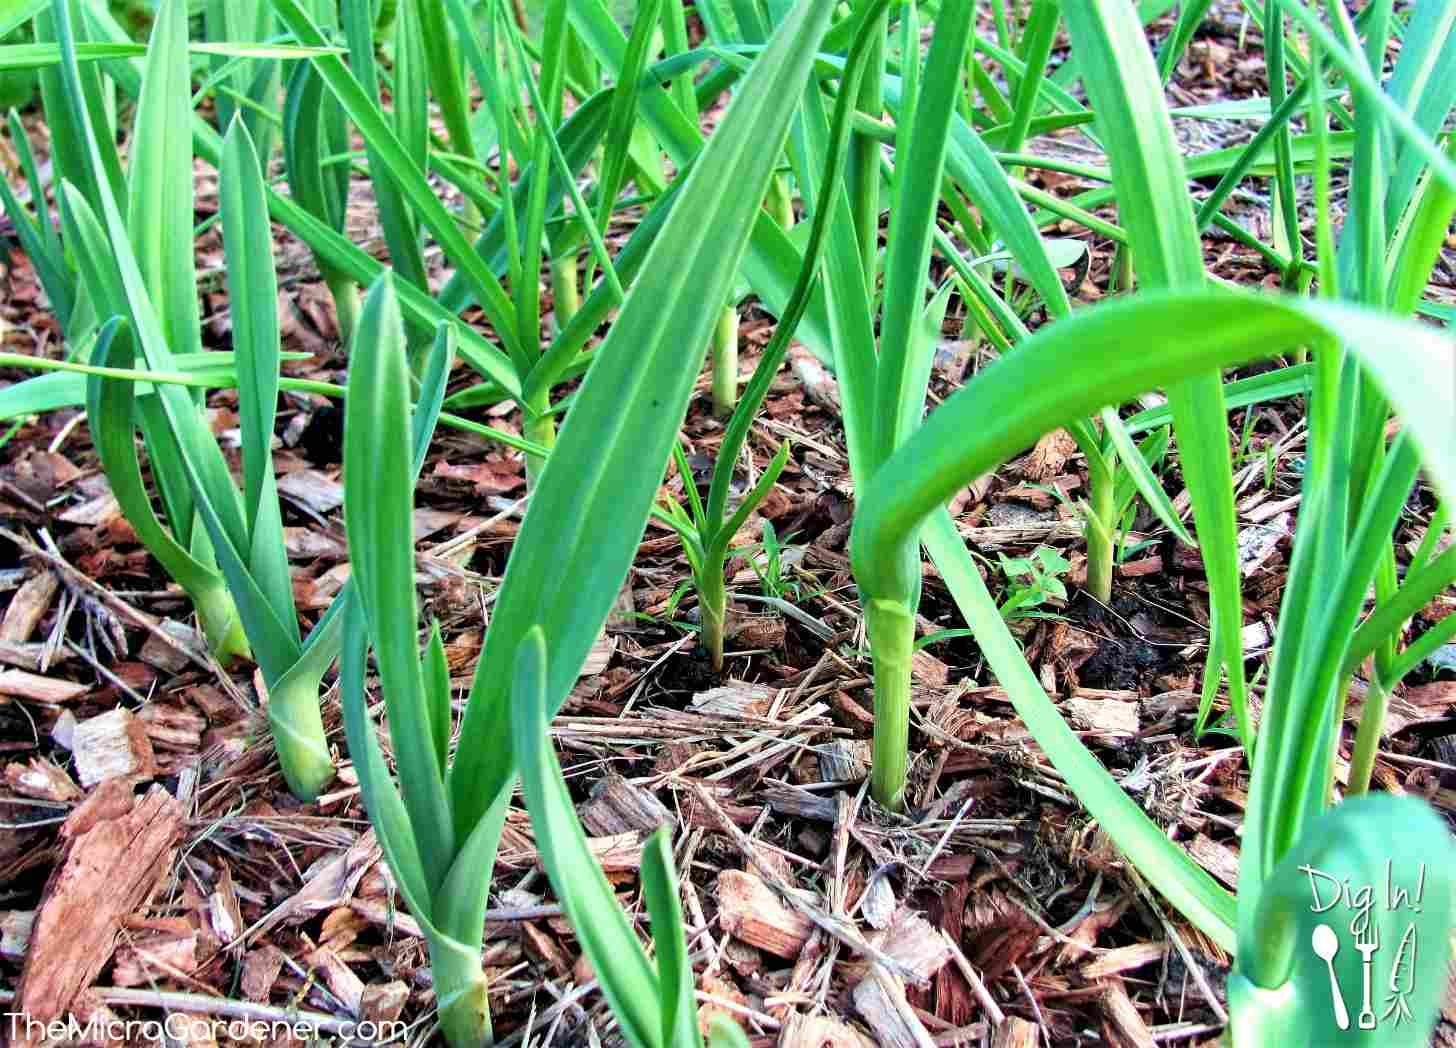
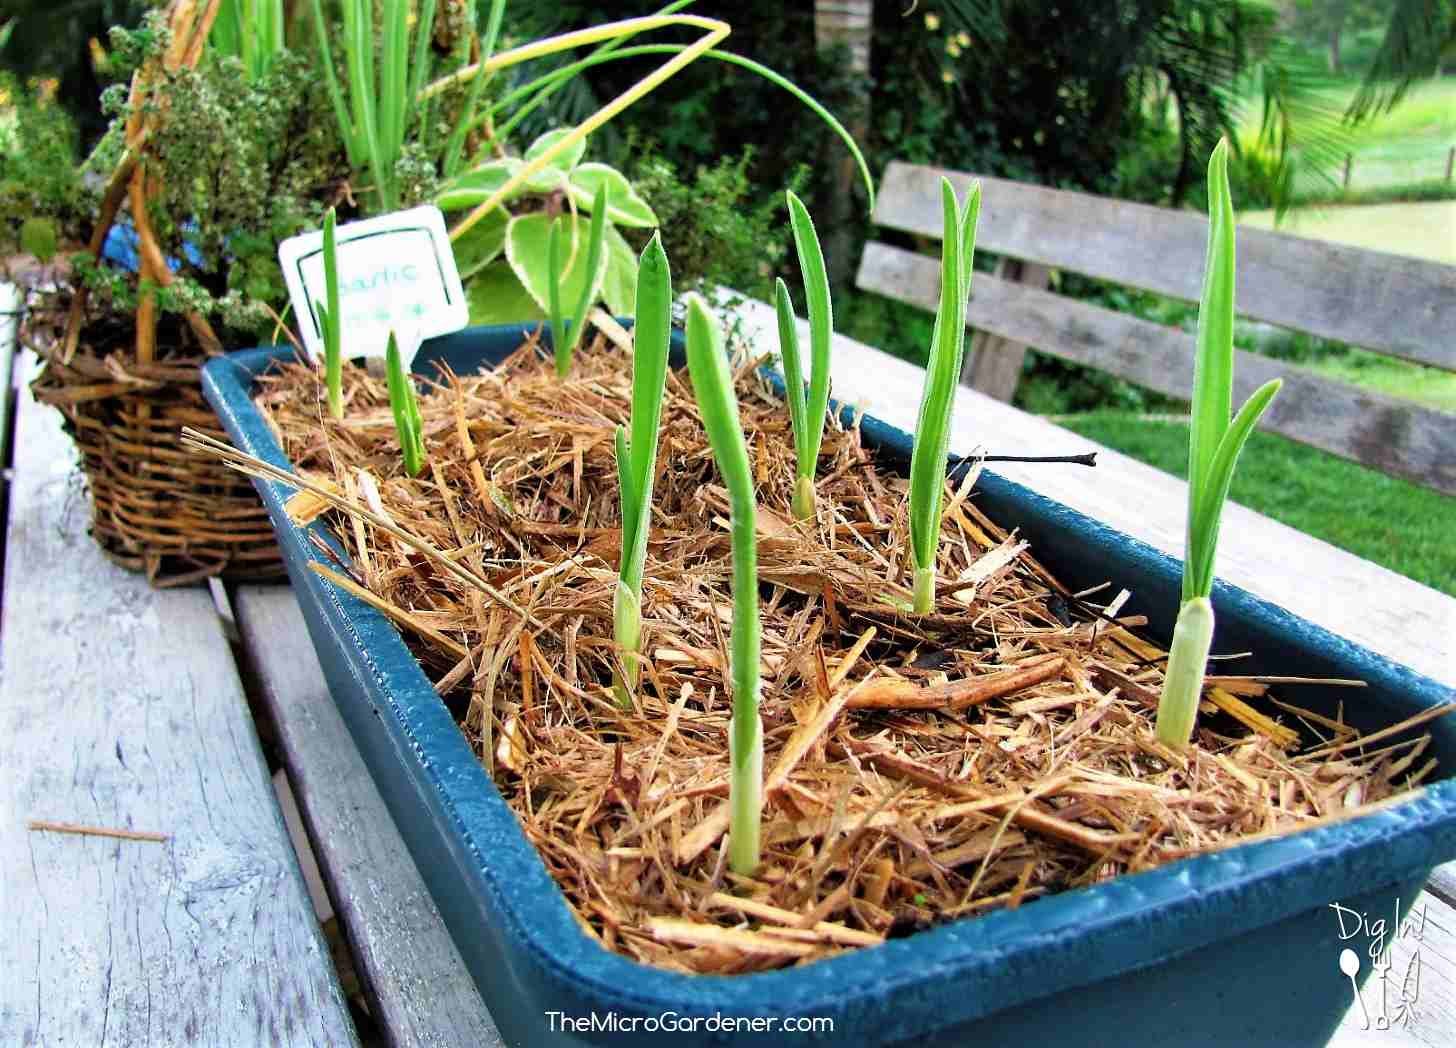
When the shoots are about 5cm/2in high, add mulch thickly to suppress weeds.
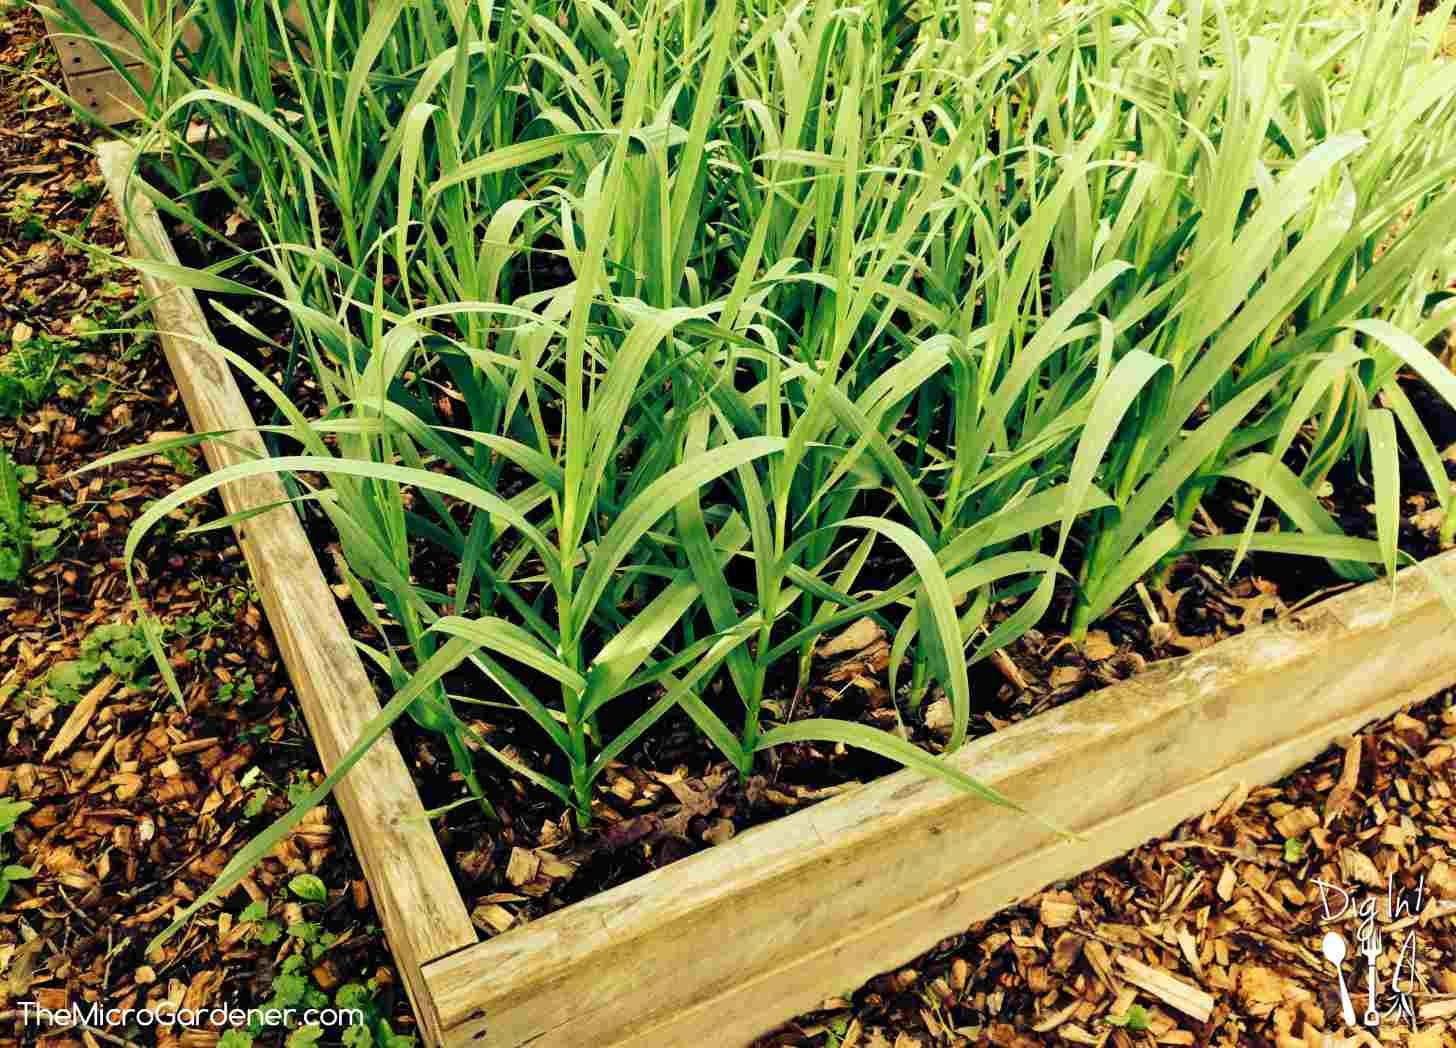
Distance between rows: 30cm/12in. Yields: 1m2/3ft2 can produce 52 garlic bulbs – one for every week of the year.
Container planting: Garlic grows 40-60cm/15-24in high depending on the variety and although you may not get as large bulbs in a pot, they are most definitely worth growing. As they are a long growing crop, interplant with fast growing lettuces and leafy greens around the outside. Pot depth should be at least 15cm/6in.
How to Plant Garlic in a Container
Step 4: How to Fertilise Garlic
The new shoots will appear and when they are about 15cm/6” tall, it’s time to fertilise again with liquid nutrients.
Every 2 weeks, I use seaweed or fish emulsion + a tablespoon of molasses in a watering can. Or sometimes I water in with diluted worm leachate (liquid from the worm farm) or compost tea. A sprinkle of worm castings or compost and minerals under the mulch can also help boost soil nutrition. Alternating their liquid diet seems to keep my garlic babies happy.
In between, water regularly (unless it rains) until the plant flowers (for hard neck varieties). Or about 1 month before harvest (soft neck). This allows bulbs to dry out and harden. I maintain adequate soil moisture of 40-50% by checking every so often with a moisture meter. Soil should be moist, NOT wet.
Most importantly keep weeds at bay. Garlic has a big appetite and doesn’t like competition muscling into its personal space!
Step 5: How to Harvest Garlic
Record your planting date in a diary or garden journal. You will need this to calculate the approximate harvest date. The countdown is on to harvest day!
Avoid watering before harvesting so the bulbs are dry. Nothing worse than pulling muddy bulbs!
You have a window of opportunity to harvest. Too late and the cloves will grow and expand so much the outer tissue paper-like wrapper will split, which will reduce bulb quality and storage life. Too soon and it will look like an onion. The segments and papery wrapper will not yet be formed. It will still be edible!
As a guideline, harvest hard neck garlic when roughly one third to half of the leaves are brown and wilted. Harvest soft neck varieties when the bottom few leaves start dying off or the garlic falls over. If you’re not sure, pull out one bulb to test it is fully formed before harvesting the whole crop.
Your bulbs may be different sizes depending on the variety and when they were planted.
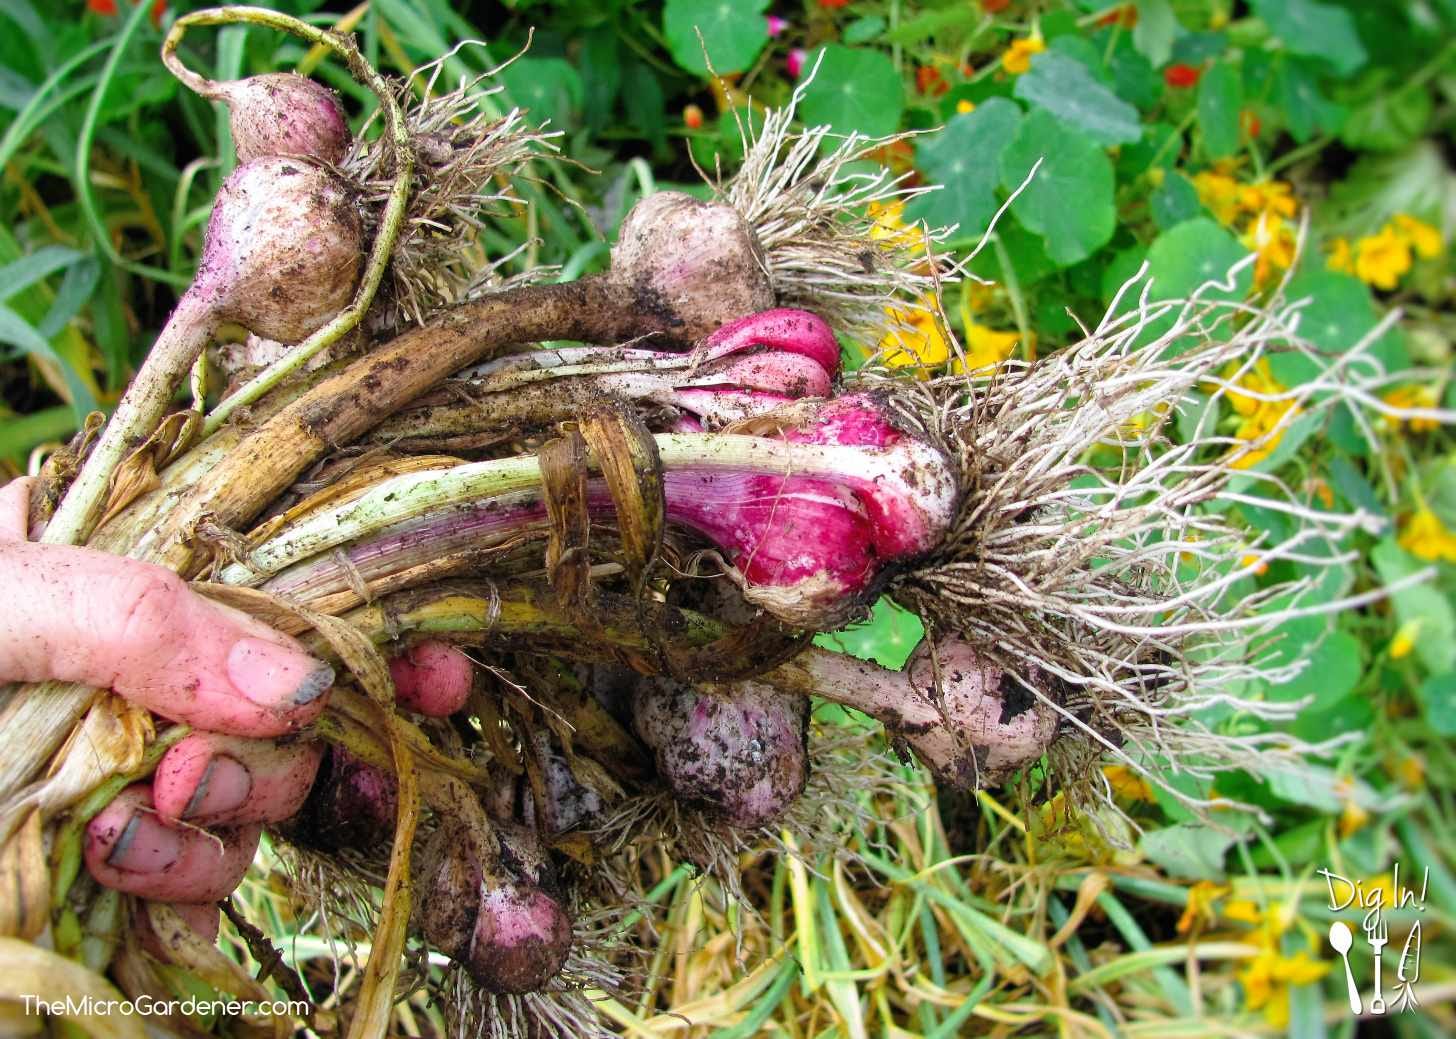
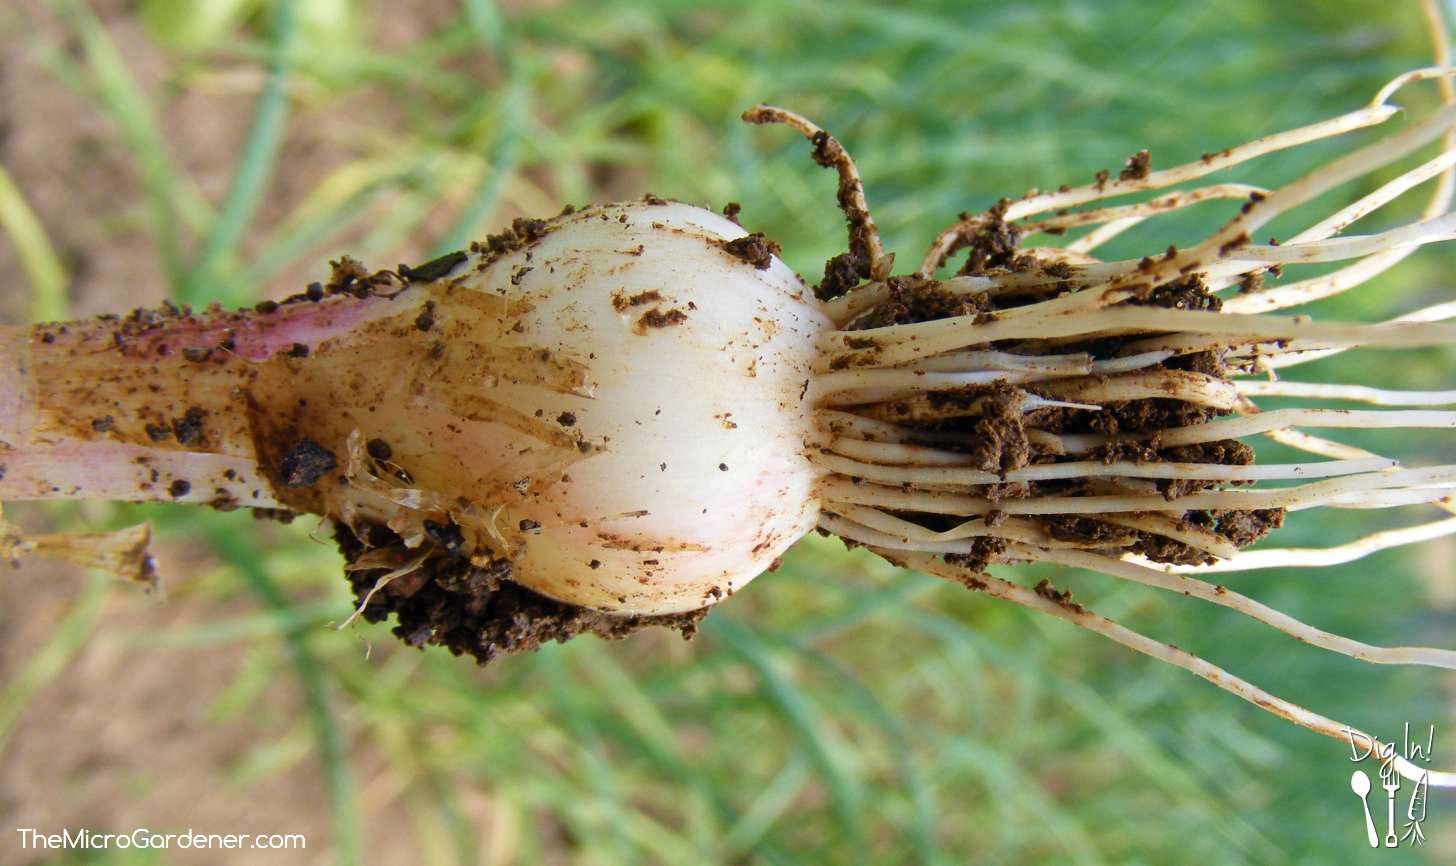
Dig or gently pull up the whole plant. I don’t recommend using a garden fork or you can accidentally spear your bulb, like I did the first time! Watch out for earthworms that love to party around the roots.
Don’t be tempted to wash it at this stage. Dirt is GOOD! Leave it be – you can gently brush off the excess with a toothbrush after it’s cured.
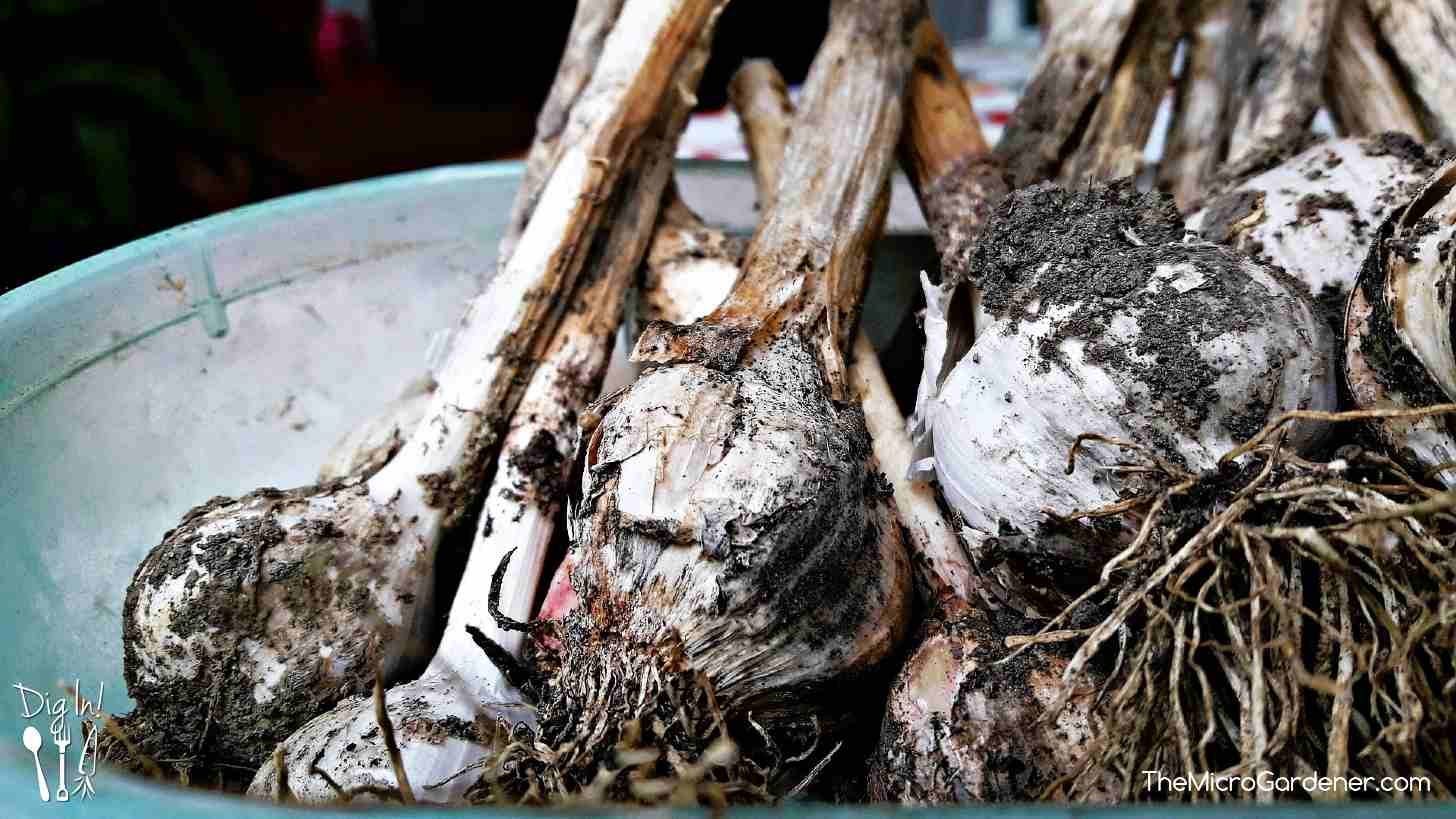
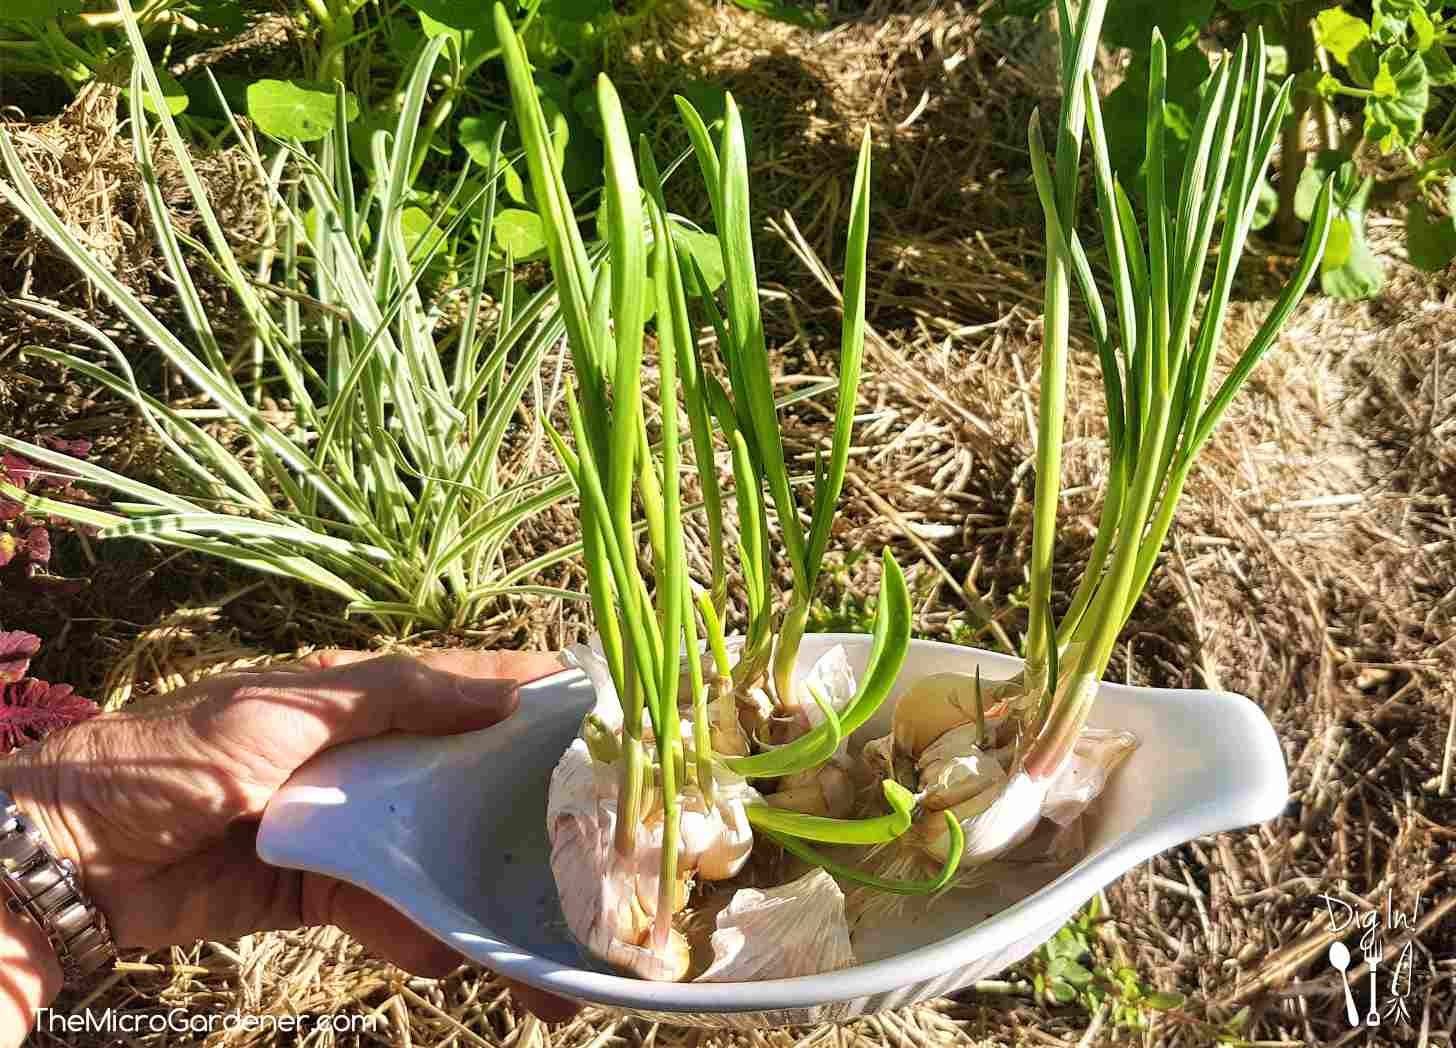
Leave a few garlic heads in the soil rather than harvesting them all at this stage.
When they start to produce little green shoots, you can plant the cloves individually for your next crop. They’ll start to grow quickly as they already have roots.
If you need garlic before it is fully grown, you can still harvest immature garlic bulbs. They’ll look more like leeks and won’t have fully developed flavour.
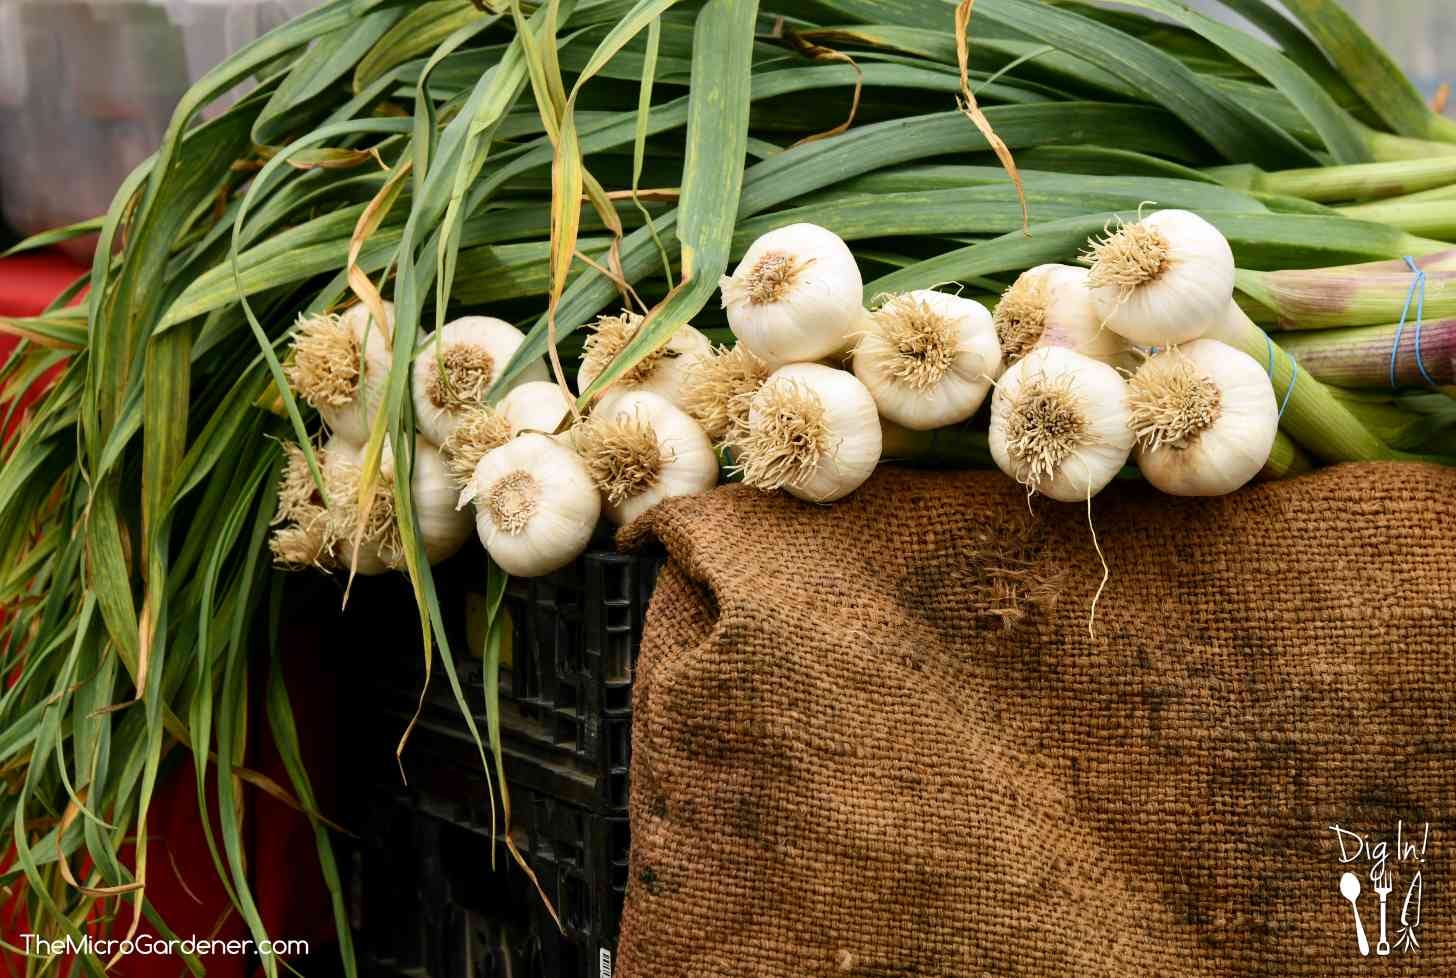
How to Store Garlic
To cure your garlic so it stores well, hang in a dry, airy place in the shade or on racks. Dry the bulbs for a couple of weeks (up to 4 weeks or even longer as needed in cool zones). The papery wrappers should be dry and crisp.
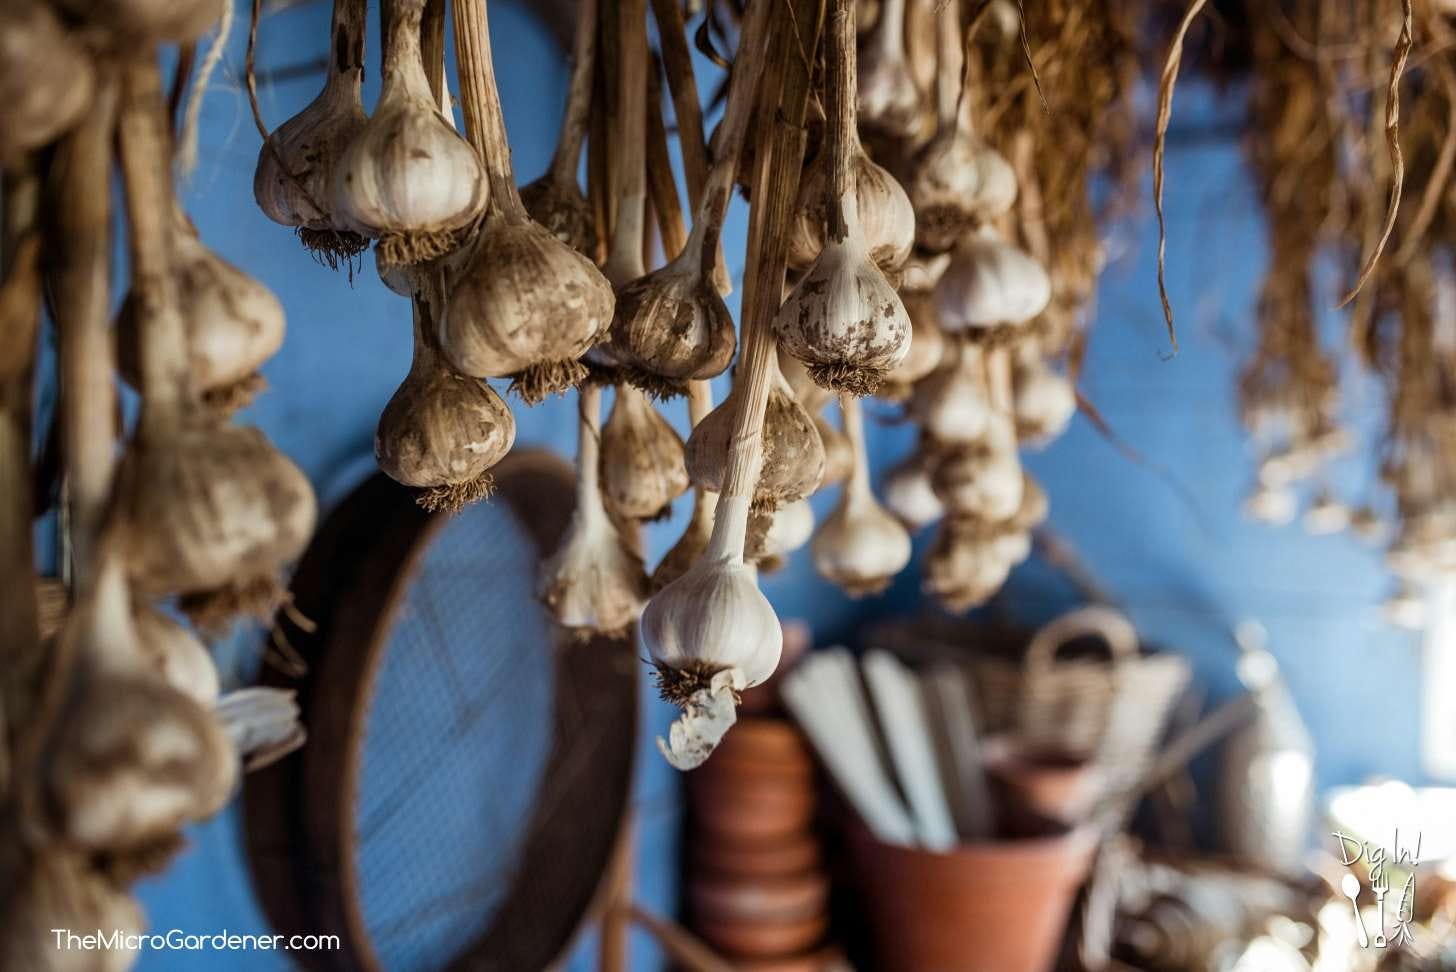
When to store garlic: Your garlic will be ready for storage when the bulb is papery and crinkled.
Well-cured skins will harden enough with a protective outer papery wrapper to store for 6-7 months.
Harvesting, Curing and Storing Garlic
Hang garlic: When your garlic bulbs are fully dried, press hard. If there’s no resistance, you are ready to store the garlic.
Haircut: If you are going to plait your garlic, leave the leaves on. Otherwise, trim the leaf tops approximately 2.5cm/1in above the bulb and snip the roots off.
I prefer my garlic braids to show a bit more of the decorative plait than tightly bunched ones. I find them easier to manage because there is a little space between each bulb and it shows off the leaves as well as the garlic. So pretty!
How to Braid Garlic
Freeze: Place individual cloves in a freezer bag or air tight container. Remove as much air as possible, seal and label with the date. Store for up to 3 months. You can freeze garlic cooked or raw to use later. Whole cloves will retain their full flavour but chopped or minced raw garlic will start to develop allicin. This active ingredient is what makes it taste hot. So releasing it will give your garlic a more mellow taste. Just use a little more in the recipe if you choose to freeze, to make up for the less potent flavour when you defrost.
Freeze minced garlic in an ice cube tray for convenient portions.
Store in a garlic keeper or open weave basket. Avoid storing garlic near humidity or steam. This can reduce the storage life or your garlic bulbs.
You can store garlic in the fridge. However, this will reduce the flavour of your gorgeous garlic. Putting it in plastic or airtight containers can produce mouldy, rotted or sprouting garlic!
How to Grow Garlic Tips
These are a few extra things to know.
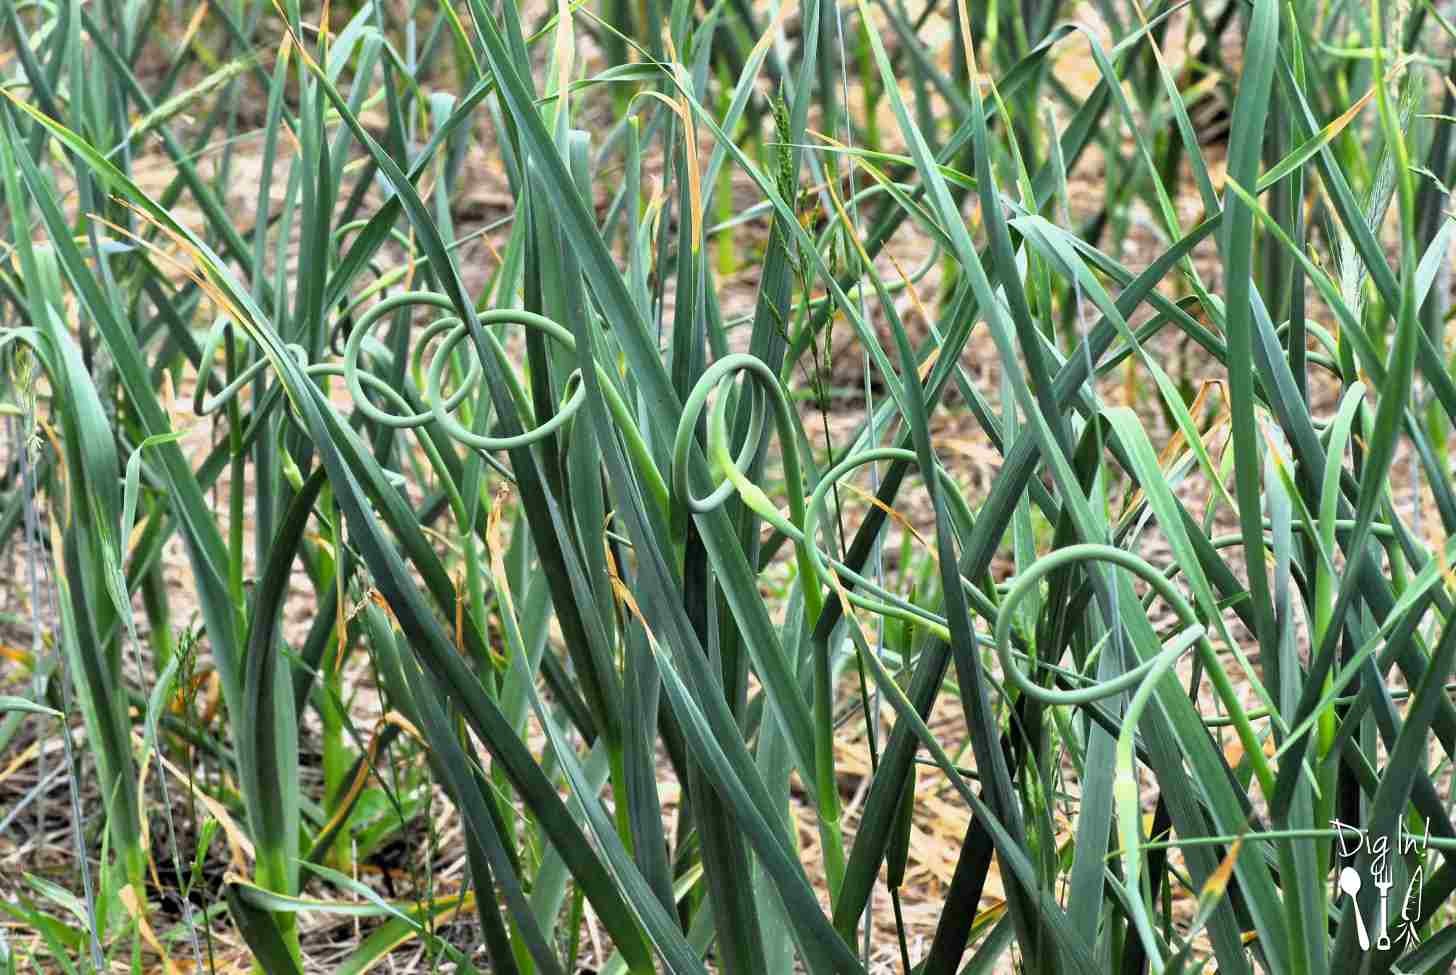
Hard-neck garlic varieties produce flower stems (‘scapes’) that form heads with bulbils. Prune these scapes off as soon as they appear, so the plant puts its energy into producing a larger garlic bulb. Chop up scapes into bite-size pieces and substitute for onions or garlic in recipes!
Grow garlic under roses to deter aphids. The strongly scented foliage is a deterrent.
Ensure soil is moist for newly planted garlic, so roots develop. Avoid over watering and ensure good soil drainage to prevent cloves rotting.
If you have a problem it’s likely to be due to lack of soil preparation, management during growing, incorrect pH, choosing the wrong variety for your zone or planting at the wrong time.
I hope you’ve enjoyed learning how to grow garlic. In ‘Amazing Uses for Garlic in Your Home & Garden’ I share some of the wonderful ways you can benefit from your gorgeous garlic – recipes, garden tips and for medicinal purposes. You might also enjoy Guide to Growing Spring Onions – both indoors and out!
Have you tried to grow garlic before? What have your experiences been?
Garlic References & Resources
Australian Quarantine Inspection Services (AQIS) requirements for imported garlic “The produce is subject to mandatory (pre-shipment or on-arrival) fumigation with methyl bromide at the rate of 40g/m³ for 3 hours at 21°C.”
‘Fresher and Smellier‘ – The Age article – Explains good reasons to ask where your garlic comes from.
Methyl bromide toxicity report – PAN Pesticides Database.
Chemical Pesticides and Food Irradiation – the dangers and alternatives
Diggers Club – Various varieties. (Australia)
Garlic Australia resources
🌼 If this resonated or helped an idea take root, your support helps sustain the garden behind the words.

AI Notice: This content is not authorised for AI training, scraping, or summarisation. © Anne Gibson, All rights reserved 2025.